This article is more than 1 year old
Get your network ready for World IPv6 Day
Survey the lie of the LAN
Step 2 – Remote setup
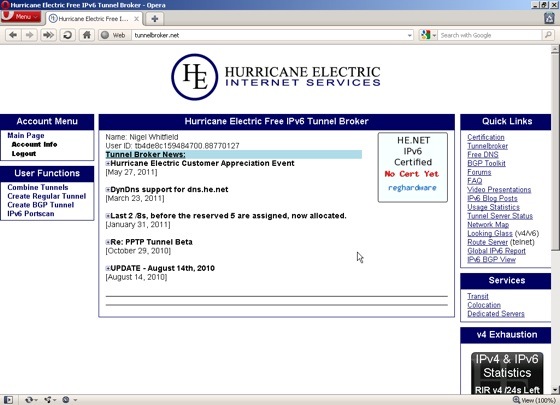
This is the main page of the TunnelBroker site, once you’ve logged in. The next step is to create a tunnel, so click the ‘Create Regular Tunnel’ link in the User Functions panel at the left.
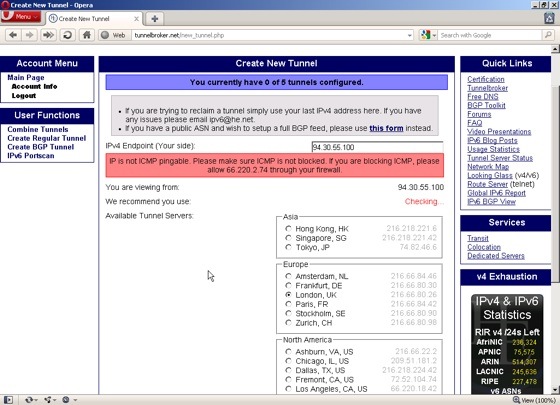
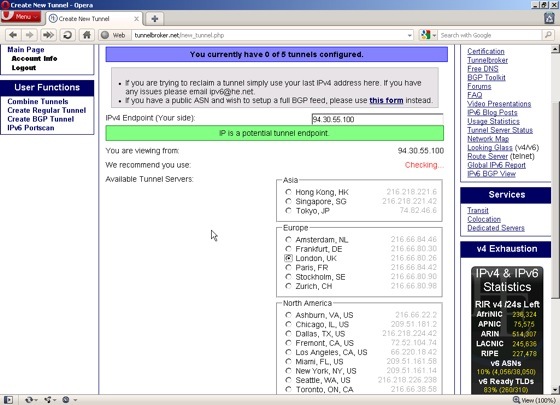
On the next page, enter the public IP address of your local machine. The Tunnel Broker site will check to see if it’s reachable and if – like my system – it’s not, you’ll see a warning message asking you to allow 66.220.2.74 through your firewall. When you’ve got that sorted correctly, you’ll see a message in a green box telling you it’s a potential endpoint.
One thing to remember here is that this check is not necessarily from the default endpoint at Hurricane Electric. If, like me, you’ve selected a different location, like London, then you’ll need to ensure that you set up your firewall to allow the tunnel to work to that address too. Forget that and you’ll spend ages scratching your head and wondering why things aren’t working. So, make sure you jot down the IP address of the tunnel server that you choose. You may also have to configure your firewall to allow protocol number 41 to pass through it, which is ‘IPv6 encapsulated in IPv4’
Scroll down the page and click ‘Create tunnel’.


