This article is more than 1 year old
Getting Started with Avisynth
Turn your PC into a video powerhouse
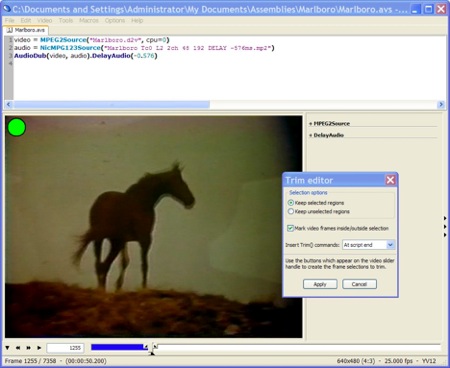
Stop at the frame just before the ad-break, and hit the End key. This brings up AvsP's Trim Editor:

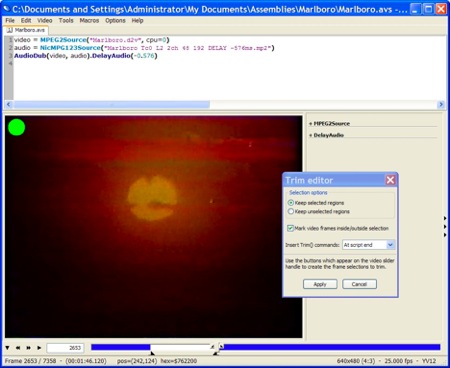
"End" here means 'end of the section we want to keep', so make sure the Trim Editor's selection option is set to 'Keep selected region'. Now use the arrow and/or Page keys to wind forward to the end of the ad break. Select the first frame you want to keep and hit the Home key:

The two blue sections are what we're keeping. Now click on the Apply button to complete the Trim and discard the unwanted white section. Our source hasn't been changed in any way by this, but you'll notice that AvsP has written a new line into the script:

That double plus operator is what Avisynth calls an "aligned splice" which joins the two clips in a way that ensures the sound stays in sync. To check the splice, we want to run a section of the resulting clip to see how it plays, starting perhaps 200 frames before the splice and ending 200 frames after the splice. So we write a temporary fifth line, like this:

I said "we write", but let's get AvsP to do it. We can create a macro, a plain text file that looks like this:
# this python macro sets an inspection trim
# centered on the current frame and extending
# margin number of frames forward and backward
current = avsp.GetFrameNumber()
margin = 200
start = current - margin
end = current + margin
avsp.InsertText('Trim(%i,%i) #Inspection Trim' % (start, end), pos=-1 )
Call it something like Inspection Trim.py (the suffix is important) and save it into the AvsP's macros sub-directory. AvsP's 'Configure Shortcuts' menu under 'Options' will let you assign this macro to a key combo (I use Alt-i).
