This article is more than 1 year old
VPN security - if you want it, come and get it
Attention WiFi hotspotters: You want it
Housekeeping, subnets, and domain names for dynamic IPs
You'll need a trusted server with an always-on connection to the net. We can't stress enough the the server needs to be free of malware and be connected to a network you trust. We used a home machine with broadband, so these instructions are tailored to that arrangement.
Step 1: Housekeeping
Before installing and configuring OpenVPN, you'll need to take care of several housekeeping items necessary to make the program work smoothly. First, if your client is running on a local area network, make sure its subnet isn't one of the more common IP numbers in use. A bevy of home routers use 192.168.1.x by default, and this will almost certainly pose a problem. If you go to a Wi-Fi hotspot that uses the same subnet as the one used by your server, there will be conflicts and you will be unable to connect.
To prevent this problem, renumber the subnet connected to your server machine to one of the more obscure numbers. We picked 192.168.199.1, but as this list makes clear, there's no shortage of available of private IPv4 addresses to choose from. This is how the configuration page of our Linksys router looked after the change.
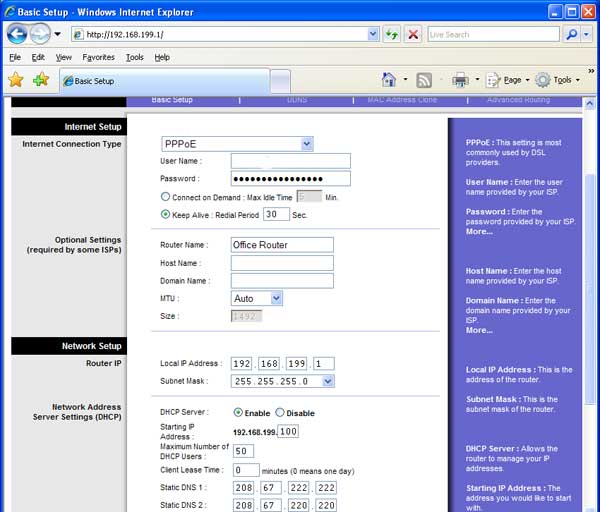
Change the subnet to 192.168.199.1
While you're still in your LAN settings, identify a chunk of addresses in your subnet that won't be used by any other machines connecting to the network. We picked 11 addresses starting at 192.168.199.151. Jot this information down. You'll need it later.
Step 2: For Servers with Dynamic IP Addresses
If the IP address of your server machine isn't fixed and you don't already have one, you'll need a domain name mapped to the IP address of your server machine. (If the server has an IP address that never changes, you can skip this section and proceed to step 3.) DynDNS allows you to do this for free using their Dynamic DNS service.
You'll need to create an account that includes a username and password. Be sure to pick a strong combination and keep it handy, because you'll need it in a moment or two. Now, log in to the account you just created and choose the Add Host Services link. This will allow you to create your very own domain name that will automatically map to your server machine. To do that, type in a domain name, select the "Offline Hostname" option, and click on the "create host" button at the bottom of the page.
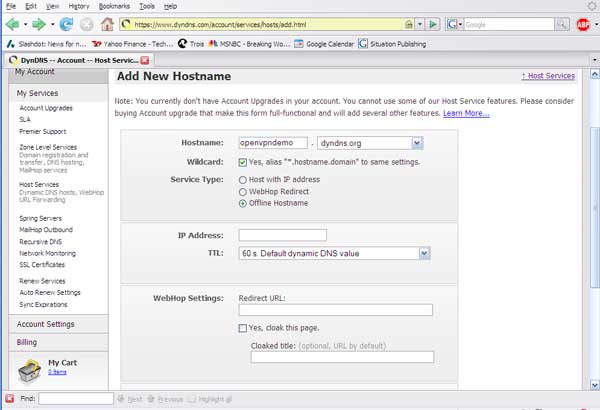
Choose a domain name to map to your server
We chose the domain name openvpndemo.dyndns.org. You can pick whatever you want, as long as no one has beat you to it. Just be sure to remember what the domain name is, because you'll need it later in the configuration process.
Now, download the DynDNS Updater software from this link and install it on the server machine. Choose the default setup options. When it opens for the first time, you'll be prompted for a username and password. Enter the username and password you just established when you created your DynDNS account.
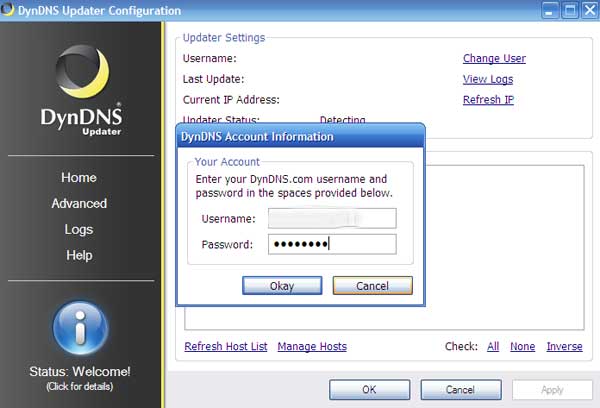
Enter the username and password for the account you just created
Once you enter the username and password, DynDNS Updater will display the domain name you just created in the "Dynamic DNS Hosts" section. Check the box and click the "apply" button.
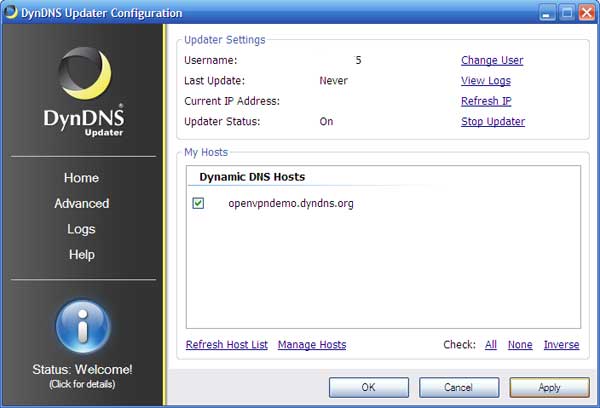
DynDNS configuration page
Presto, you have now set up a domain name for your server machine. Each time its IP number changes (assuming its a dynamic setup) DynDNS will update the domain name accordingly. The DynDNS icon should now show in your system tray.
(If you're having problems with this step, DynDNS offers their own instructions here.)
