This article is more than 1 year old
Get started with Silverlight
A time to shine
The basics
Whichever platform you use to develop, you'll need to install the Silverlight 1.0 runtime for your browser. If you visit a site that uses Silverlight, and you don't yet have the Silverlight runtime installed, you'll be directed to an installation process. The runtime is surprisingly small (less than 2MB). The Silverlight home page lets you install the plug-in and see demonstrations. The Microsoft Silverlight 1.0 Software Development Kit (SDK) is available along with other resources for Windows from MSDN.
A Silverlight application typically consists of XAML markup and JavaScript code. You also need an HTML file to call the application. We'll start with four files:
- Default.html – the HTML page containing the Silverlight content
- Silverlight.js – the Microsoft provided runtime file
- CreateSilverlight.js – some JavaScript that you provide to start your application
- Scene.xaml – some XAML describing your desired Silverlight content
The HTML contains references to the JavaScript files, provides a DIV tag to host the Silverlight control and then calls the JavaScript code to start the Silverlight content:
<!DOCTYPE html PUBLIC
  "-//W3C//DTD XHTML 1.0 Transitional//EN"
  "http://www.w3.org/TR/xhtml1/DTD/xhtml1-transitional.dtd">
The Silverlight.js file is a standard file, distributed as part of the Microsoft Silverlight 1.0 SDK and widely available elsewhere on the Web.
The CreateSilverlight.js file defines the createSilverlight() function that is called from the HTML. It finds the DIV tag that will host the Silverlight control and provides the glue to load and start your XAML content (defined in Scene.xaml).
function createSilverlight()
{
        Silverlight.createObjectEx({
                source: 'Scene.xaml',
                parentElement: document.getElementById('SilverlightPlugInHost'),
                id: 'SilverlightPlugIn',
                properties: {
                        width: '400',
                        height: '400',
                        background:'#ffffff',
            isWindowless: 'false',
                        version: '1.0'
                },
                events: {
                    onError: null,
                        onLoad: null
                },
                context: null
        });
}
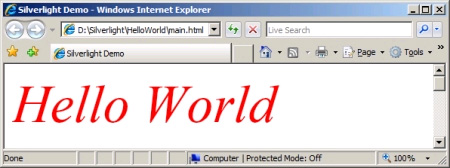
All the magic happens in Scene.xaml – this is where we define our Hello World application.
<Canvas xmlns="http://schemas.microsoft.com/client/2007" xmlns:x="http://schemas.microsoft.com/winfx/2006/xaml">

        <TextBlock FontFamily="Times New Roman"
                           FontSize="70"
                           FontStyle="Italic"
                           Foreground="Red"
                           Text="Hello World" />

</Canvas>
I'll explain the thinking behind XAML in a moment, but for now save these four files to a new directory and load the HTML into your browser. If you are running locally, your browser may warn you about Active X controls and block the content (this isn't the case when you run from a web server). Unblocking should give you a page like this: