Original URL: https://www.theregister.com/2010/10/21/vulture_1/
Vulture 1 sprouts wings and a tail
Lots of lovely construction snaps for your viewing pleasure
Posted in Science, 21st October 2010 11:11 GMT
The Paper Aircraft Released Into Space team is assembling for the imminent launch of our Vulture 1 aircraft into the blue yonder, and here for your viewing pleasure are some further constructional details of our advanced all-paper vehicle.
 Before getting stuck into the snaps, those of you who aren't up to speed on the Vulture 1 are advised to check out our previous pieces, especially this one on how we put together the main fuselage.
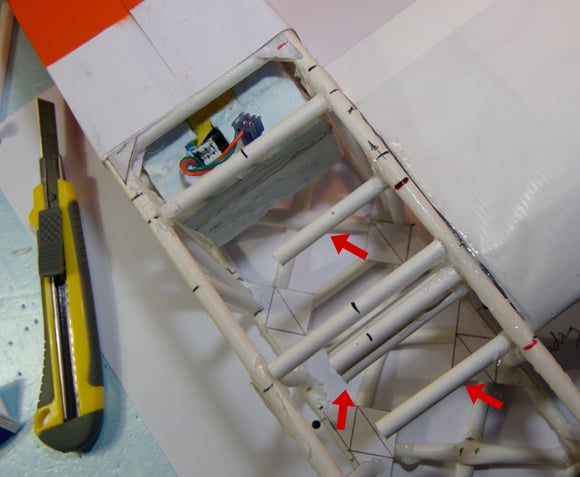
Our first job before putting the tail together was to mount the GPS/APRS board (details here). Cue styrofoam...
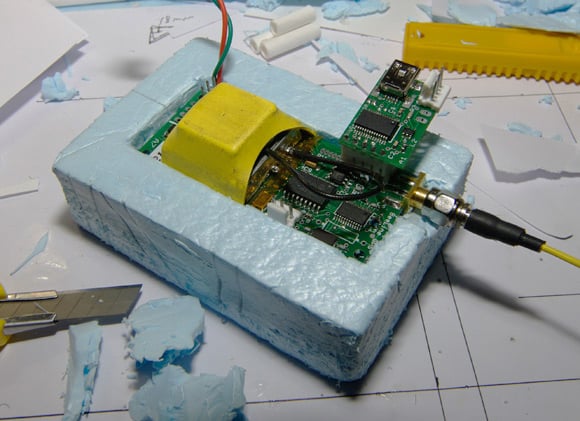
...and here's how the thing sits inside the fuselage:
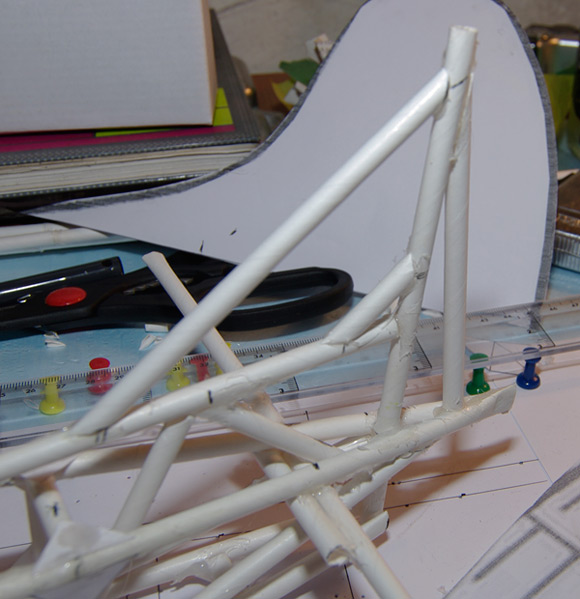
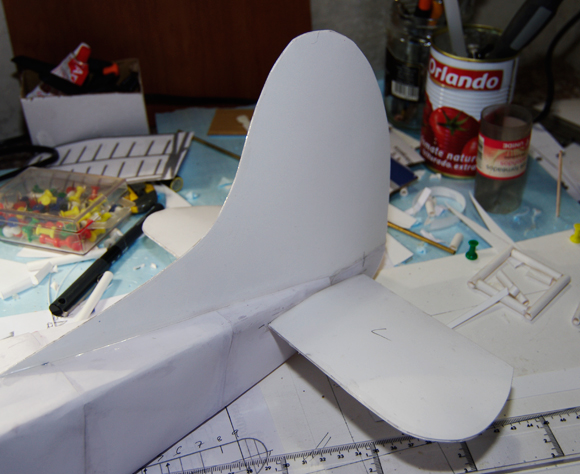
Picking up where we left off last time, the tail structure is ready to accept the rudder and elevators:
We mocked up both from paper...
...and then lovingly crafted the real rudder from a three-ply paper laminate:

We made the laminate by glueing together three sheets of bog-standard paper with Photo Mount, and leaving it for 24 hours under a big pile of books. The paper tabs are to ensure that the two halves of the rudder come together with a clean edge. We found that simply applying glue along the join resulted in an uneven joint, which in turn distorted the rudder when we teased it over the straw structure.
Once the two halves were mated and glued together with epoxy, the rudder could be fixed to the structure. For the record, all the glueing from here onwards is with epoxy, unless otherwise stated.
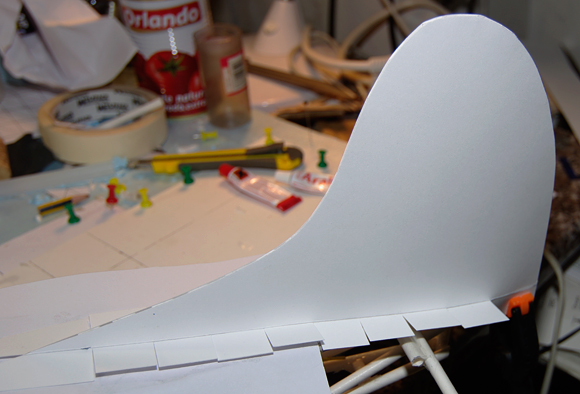
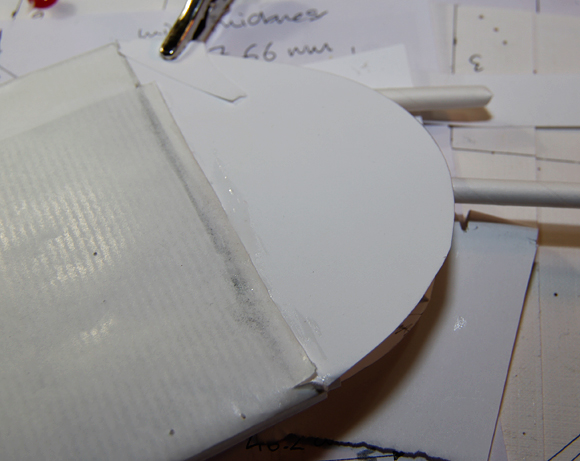
With the rudder on, it was just a matter of making good the tail with paper skinning:
The skin is standard printer paper glued to the paper straws. We abandoned all attempts at stressed skin surfaces since this proved disastrous for the structure.
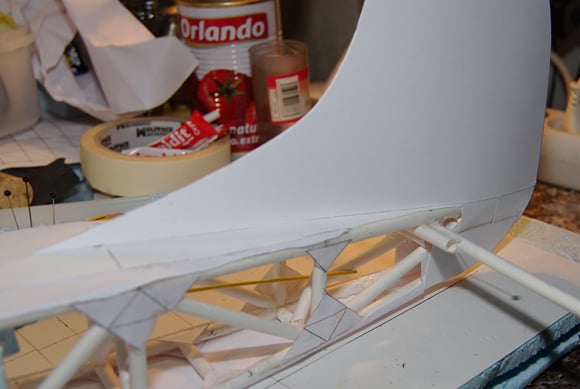
In fact, the paper straws are in themselves pretty strong, and since they're extremely light, there's no impediment to throwing in lots of structure and considering the skin as simply a protective covering.
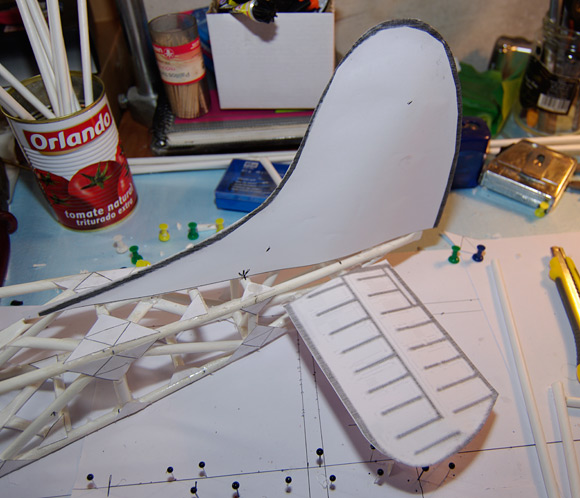
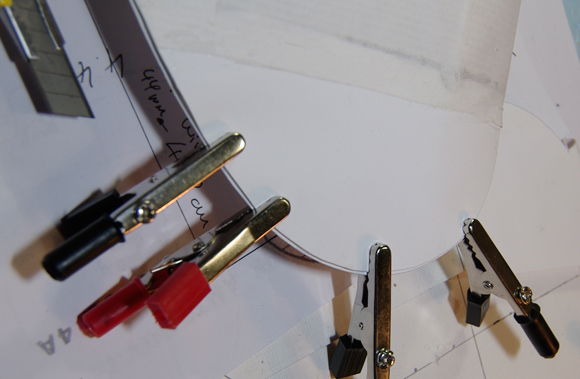
We made the elevators in the same way as the rudder:
Once they were on, we finished the skinning and made good all the joints with a general-purpose rubber-based repair adhesive. Job done.
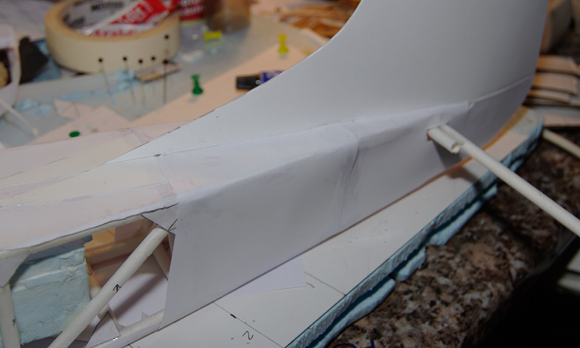
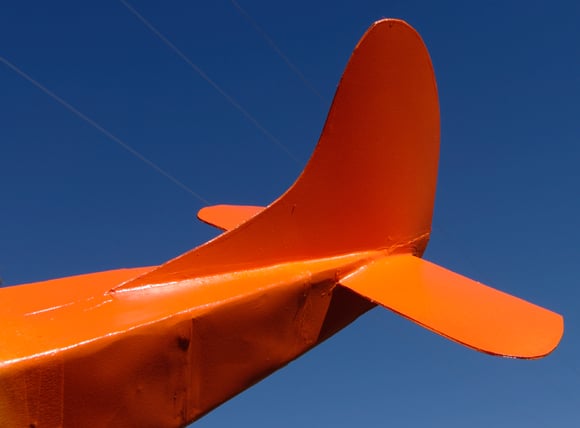
You'll be wondering how the paper will be protected from the elements. The answer is off-the-shelf gloss spray paint - in the case of the tail a striking orange:
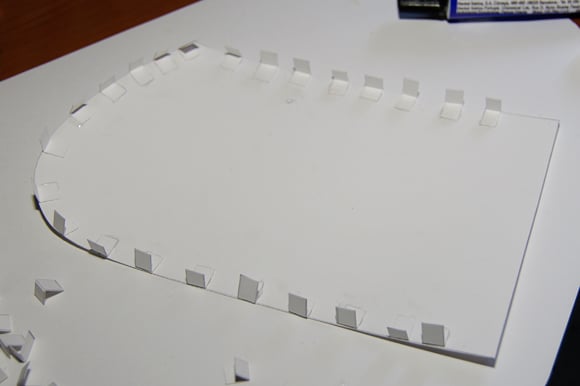
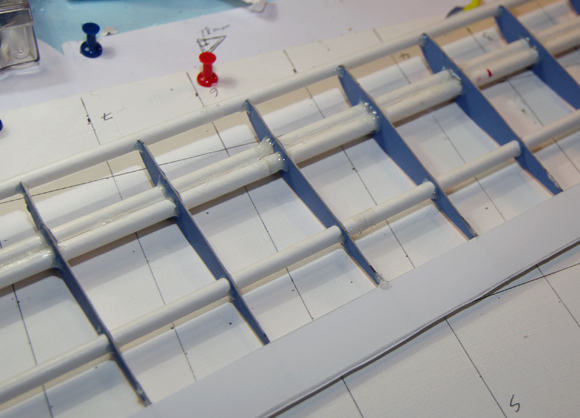
At this point, suitably fortified with a quick shot of brandy, we turned our attention to the wings. Our previous effort, and readers' comments regarding the same, prompted us to go with a redesigned rib, which looks like this:
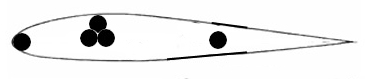
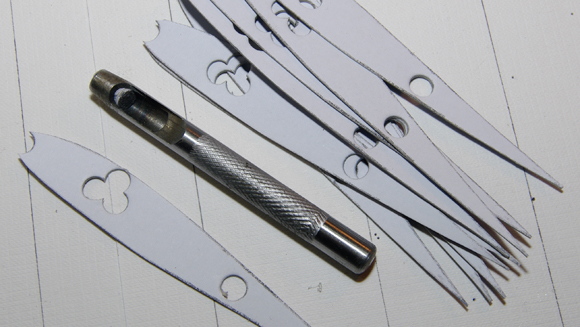
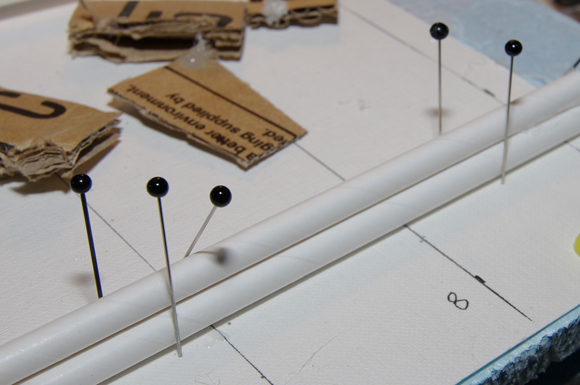
We made a raft of ribs from a four-ply paper laminate (as per the rudder and elevators, but with an extra ply) and punched them out to accept the paper-straw spars:
The main spar is formed from three straws, which you have to keep pinned down during glueing to keep them hard up against each other:
Here's the main spar passing through the ribs...
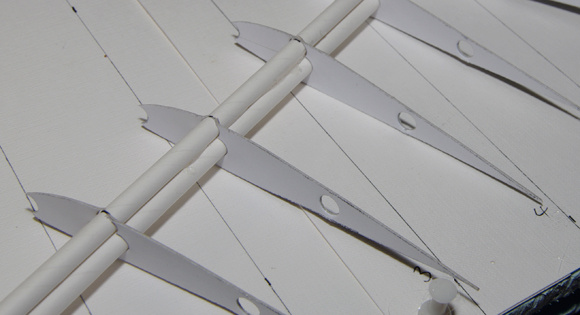
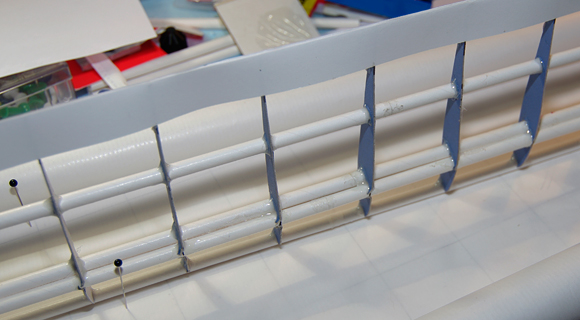
...and the trailing edge spar in position. Note the high-tech wing assembly jig:
To complete the basic structure, we glued in the leading edge spar:
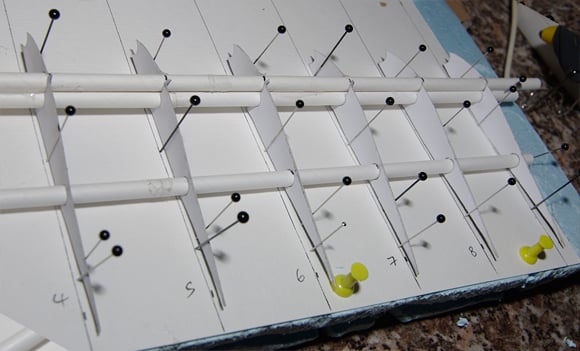
The ribs are very vulnerable at the trailing edge, so we needed a strengthening strip of paper, which also serves as a good fixing surface for the skin. In case you're wondering why the ribs have a blue side, that's quite deliberate.
One of the rib plies is blue paper, to indicate the side that was facing down when we punched out the holes. The punch creates a slightly concave surface around the holes, and it's important to slide the straws through the ribs in the right direction, otherwise they'll jam in the hole and tear the rib. Cunning stuff, eh?
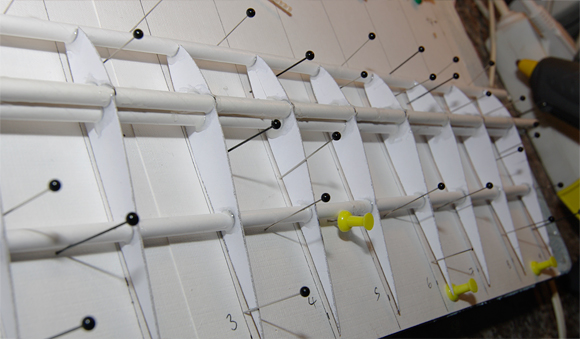
Taking a very large piece of paper (same as normal printer paper, but off a big roll), we glued the leading edge to it and left it to dry completely:
The skin could then be pulled across the wing surface and glued to the trailing edge. Not a very exciting photo, but you get the idea...
This skin is unstressed, and don't start banging on about dope and suchlike. We did a couple of tests with a stressed surface and ended up with banana wings, so that was a non-starter.
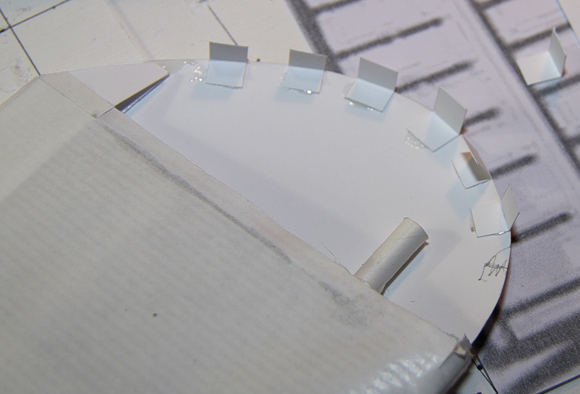
The wing tips are made in the same way as the rudder and elevators. We just left a bit of spar beyond the outermost wing rib to provide a fixing point:
Once one surface of the wingtip was glued on, we could tease in the other...
...and glue them together:
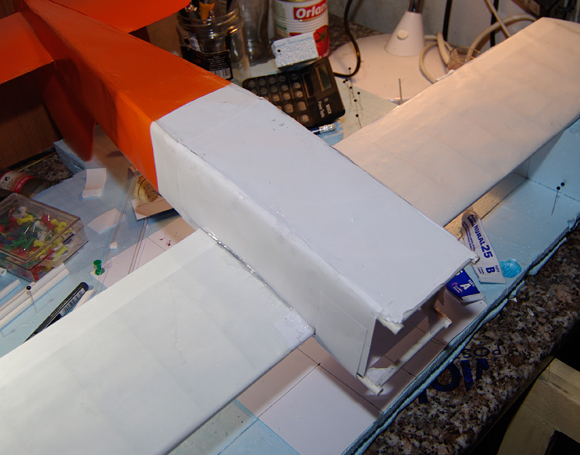
Reaching once again for the brandy bottle, we braced ourselves for fixing the wings to the fuselage. Here's the latter prepared for the big moment:
The wing sits like this, supported by a styrofoam block to ensure the correct dihedral:
...and here it is glued in, with the spars indicated:
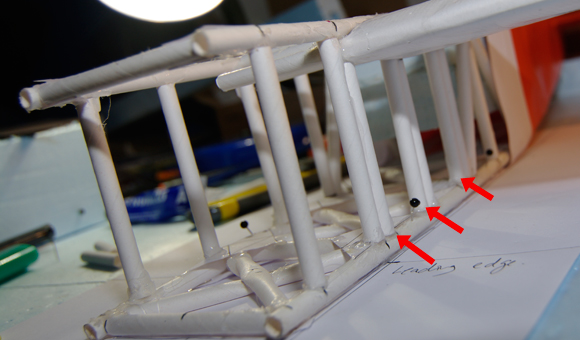
We slapped in some extra uprights (indicated) under each spar to absorb the downward force created by the wings in flight:
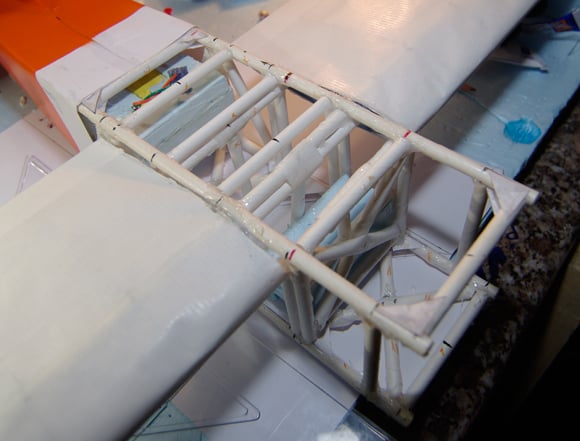
We positioned the other wing, and glued the spars together:

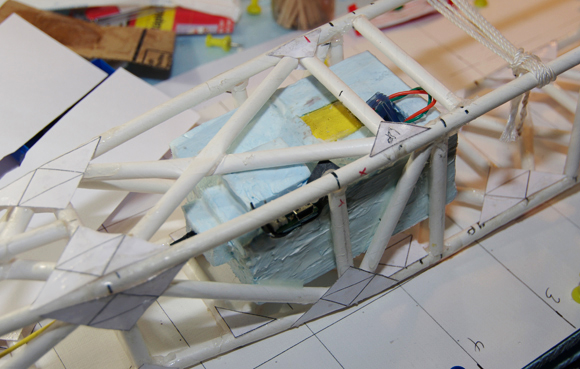
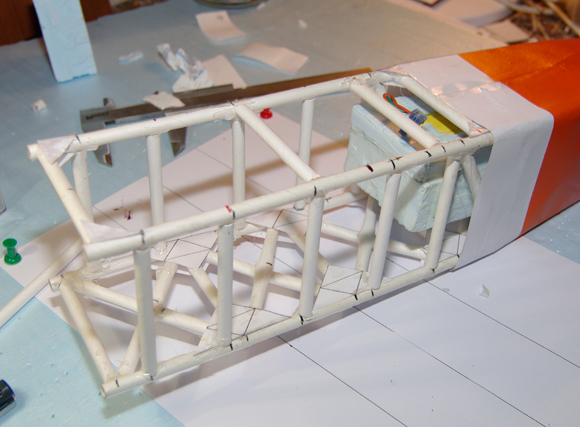
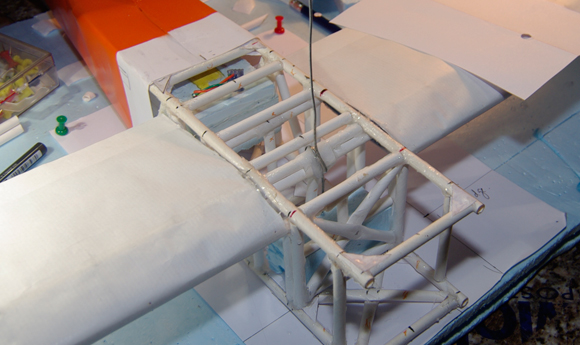
We won't bore you with details of the extra structure inside the fuselage to brace the wings - all of that will be available in due course in the CAD representation of the Vulture 1.
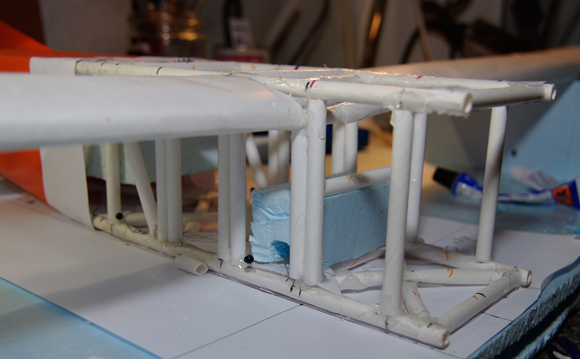
Here's some of it, though, and the styrofoam block for mounting the release wire...
...and a couple of hours later, even more meaty straw goodness:
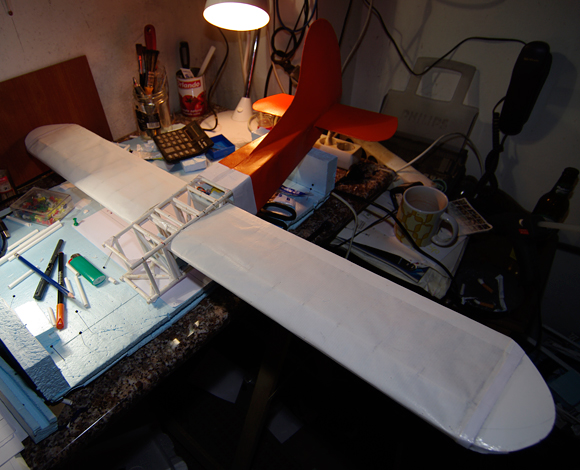
Try a view of the aircraft with both wings. Can you tell what it is yet?
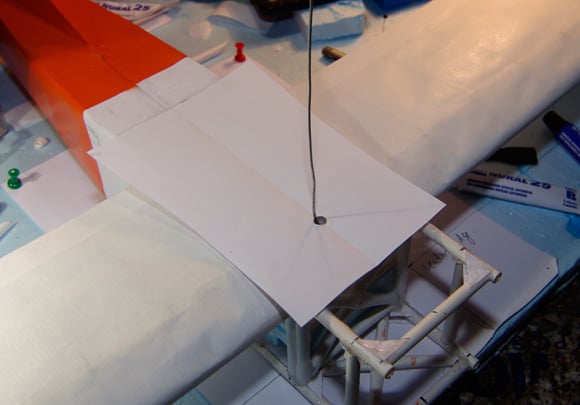
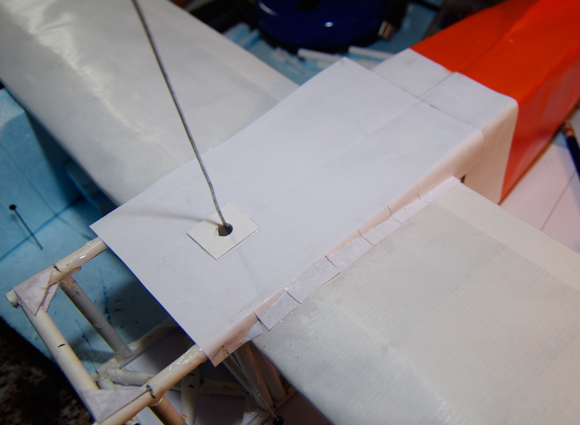
Next up, we had to glue in the release wire...
...after which we could skin the central fuselage:
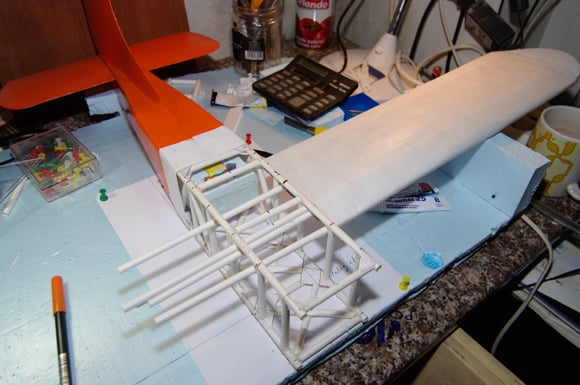
Finally, ladies and gentlemen, try this moody shot of the Vulture 1, lacking only the cockpit and nose and a lick of paint:

That's your lot for now. We'll have a final constructional update in due course... ®
Additional PARIS resources
- Our dedicated PARIS section, with all previous updates, is right here.
- New to PARIS? We have a basic mission summary here (pdf).
- Our Flickr page, for your viewing pleasure.
- Check out our magnificent YouTube channel.
