Original URL: https://www.theregister.com/2009/08/19/hdtv_setup_guide/
How to set up your HDTV like a pro
Don't stick with the shop's settings
Posted in Personal Tech, 19th August 2009 12:02 GMT
Back in the old days, when you bought – or rented – a television set, someone would deliver it, set it up and tune it in for you. And there was a very good chance that when they did that, they’d be able to find a channel broadcasting a testcard without much difficulty, and use that to make sure all the picture settings were correct, or at least not completely wide of the mark.
Buy a new TV today, and things are very different. Unless it’s coming as part of a high-end AV installation, you’ll be unpacking it yourself and trying to make the best job you can of setting it up to give the brilliant picture that the reviews raved about.
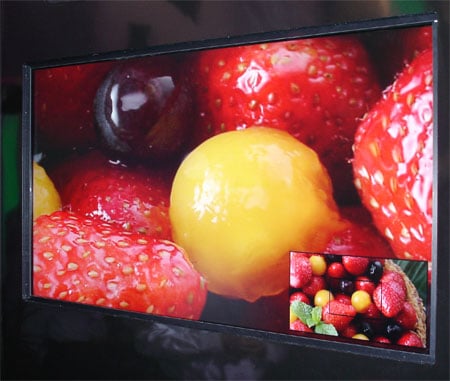
Say goodbye to lurid, shop-friendly colours
When you see a TV set in a typical showroom, it will have been set up to produce vivid, eye-catching colours and to look fairly reasonable under the harsh fluorescent lighting. A typical living room will have rather more subdued lighting, and for a more realistic picture, you may well want something rather less vivid.
There’s a huge range of settings on some modern sets, and even just the basic options can be easily misunderstood. So, just how do you set up your new flat panel to give the best picture possible?
One answer is to have it professionally calibrated – and if you have the cash to spare, then for upwards of £200-300 you can have an ISF calibrator visit your home and set the TV up for you. Prices vary, and you can expect to pay more for each input that you want set up. An ISF technician will access the hidden service menus on a TV and use a colorimeter to make sure everything is set up more accurately than you’ll be able to do it with the naked eye.
You don't have to go to the Pacific to enjoy clear blue seas
Is it worth it? Plenty of people think so, but the cost will rule it out for many. So we’re going to look at some of the DIY alternatives. They may not be quite as accurate, but you can still improve the picture, without breaking the bank.
First catch your test card
Before delving into the nitty-gritty, what do you need to set up? Firstly, you probably don’t want to spend hours tweaking a brand new panel. Wait a few weeks until it’s been used a bit, and then tweak. Remember that for the best results, you’ll have to set up the picture for each input that you’re using, if the TV remembers per-input settings. You can’t assume, for example, that a signal fed from a DVD or Blu-Ray player via HDMI will be treated in the same way as one from a Scart socket or a memory card reader.
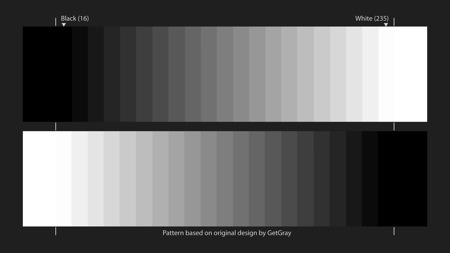
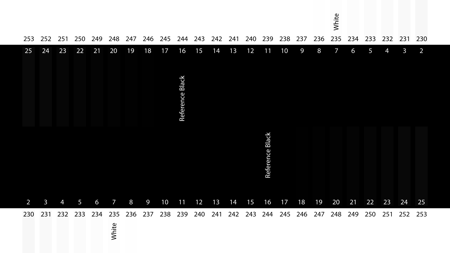
The markers show ‘below black’ and ‘above white’ points; if there’s a colour cast, ease back on the contrast
Click for full-size image
Fortunately, the switch to flat panels does mean that display setup doesn’t involve worrying about geometry – aside from stretch effects applied to 4:3 programmes, you don’t suffer from some of the more annoying issues of a CRT. It’s largely a matter of making sure black and white are set up properly, and then the colours adjusted, in that order. You can then adjust some of the other options, such as ‘sharpness’ and tinker with any additional features the set provides such as noise reduction or frame interpolation, though as a rule any ‘enhancement’ or ‘noise reduction’ options are best turned off.
To set the screen up, you’ll need patience - and test patterns. And you need to do it in the same sort of lighting as you’ll be viewing the TV. Lighting and patience are easy - what about the test patterns?
You can buy a test DVD or BD such as Digital Video Essentials, which will set you back less than £20, but in fact you don’t even really need to spend that much, as test signals – for HD at any rate – are widely available online.
At www.w6rz.net you’ll find plenty of downloadable transport streams, at full HD resolution. You can download these onto a disc, or if you have a media player than can understand .TS files, such as a including a PlayStation 3, load them on to that to calibrate it too.
It’s also worth registering on AVS Forum. Then you’ll be able to download disc images that can be burnt to a Blu-Ray or DVD and used in your Blu-Ray player, together with detailed instructions.
An alternative is the test images that are included on many Sony Blu-Ray releases: press 7669 (S-O-N-Y) when the disc’s main menu appears.
If it’s the performance of a built-in tuner you’re after, then things are a little trickier, as there aren’t many testcards broadcast. But BBC HD does transmit one, as part of its daytime preview loop, and you can find more details, and instructions on how to use it on the BBC Internet blog. It’s well worth reading that post. If you have a media player that you want to calibrate from a still image, then you can download the testcard from Flickr.
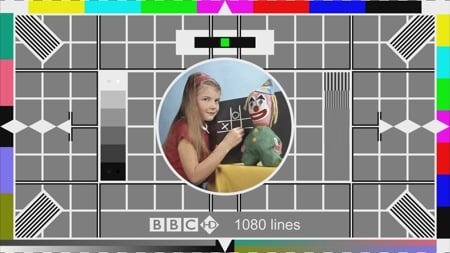
The BBC testcard is broadcast on the HD channel, as part of the preview loop
Click for full-size image
If you want to try and set things up to display correctly from a Freeview receiver, then you can summon a testcard on demand, provided your box has an up to date MHEG engine. Tune to channel 105 - the BBC red button - and wait for the logos and images to appear, then press the Yellow key on the remote. Tune to a different channel, then go back to 105, and this time press Green. When the status page appears, press Green again to display the testcard. On one of our Freeview receivers, we just saw a centre section, rather than the whole card. Note that the compression on this test card means that it’s not as accurate as one from a DVD or other source, but it should at least point you in the right direction.
Adjusting the display
Whatever test patterns you have, the first, most basic adjustments, are the same. Turn off noise reduction, and turn the sharpness control of your TV right down. Make sure you turn off any automatic adjustments that compensate for things like changing light in the room, and set the picture mode to ‘normal’ if there’s a choice of settings.
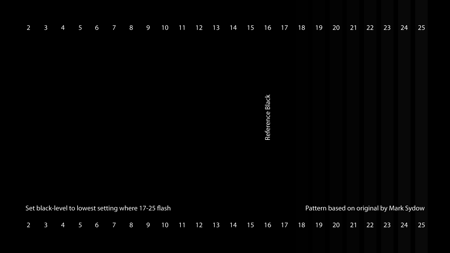
Stage one of lining up your set is adjusting the black levels, which is what the brightness control is for. On the BBC testcard, just to the left of the centre circle, is a set of grey boxes; the top white one contains two dots, and so does the bottom black one. Turn the brightness up so that you can see both the dots in the bottom box; if you’re using a different test pattern, there will usually be a series of black boxes, the darkest of which has the same purpose as the darkest dot on the BBC pattern – it’s ‘below black.’
Slowly turn down the brightness, until the ‘below black’ bar or dot is not visible, but you can make out the next one up. So, on the BBC test card, you’ll be able to see the left dot in the box; if you’re using the first test pattern on the AVS Forums disc image, then you should adjust the settings so that bars from 17 upwards are visibly flashing.
The contrast control determines the white levels of the display. With the BBC testcard, you need to adjust the settings so that you can still see the left-hand dot in the top box, and the levels don’t blend into each other – though note the information regarding the accuracy on the BBC blog about this setting. With the AVS test signals, you need to adjust the contrast so that bars 230 to 234 are flashing.
A grey ‘ramps’ test pattern – white to black on the top, and black to white below – is a good way of setting the contrast too. Make sure that you can see all the gradations between the different boxes.
You may also need to turn the contrast down a little if there’s a colour cast at high levels, until that disappears – fixing it completely is something that usually requires access to the service menus of the set, and a colorimeter, with associated software tools.
Colour and sharpness
If you want a simple straightforward adjustment of colour, then that’s what the girl in the BBC testcard is for - make her skin tones look natural, and you’re almost there. It’s not the most scientific way, though.
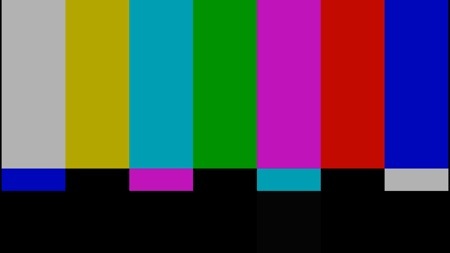
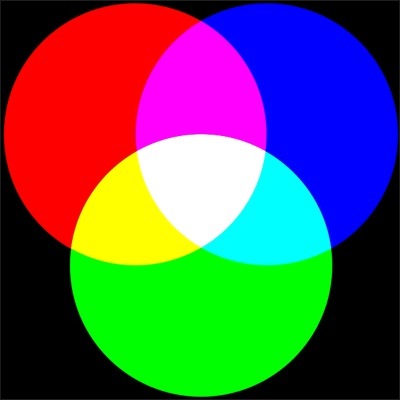
Most test pattern sets will include a set of colour bars, designed to be used with a blue filter, like the ones shown in the screenshot below. The blue used is typically ‘Tokyo Blue’, or code 071 for lighting gels. A swatch book of filters or a set of small sheets will cost around £10, so it’s probably just as effective to buy a test DVD that comes with a filter.
Look through the blue filter and pay particular attention to the sections with the blue and white patches. The filter strips out the other primary colours, and the colour is set correctly when it appears that the blue and the white patches on the screen have the same brightness – though you may need to tweak to personal taste.
After colour, turn your attention to sharpness. On the BBC testcard, the gratings to the right are used to check this - other discs have their own, specific patterns. Turn down the sharpness to avoid the blurring round the edges of fine lines, such as those in the gratings, and the worst of the moiré effects in large shaded areas. But keep an eye on the edge of solid blacks, to make sure they’re still well defined – turn sharpness down too much, and they’ll become fuzzy.
Some of the tests for this – such as the one on Sony Blu-Ray discs – also include markers for overscan; you can use this if your TV has settings to control the picture size, or a simple on/off for overscan, to check that everything is being displayed.
If you’re using a standard flat panel, that’s more or less it for DIY setup. A colorimeter like the SpyderTV can help you achieve more accurate colour setup – but at around £100, plus your time, if you only have one set to adjust, it may be better value to invest in a professional ISF calibration, if you feel that a visual setup isn’t good enough. ®
