This article is more than 1 year old
Fanboi primer: How to move your iTunes from PC to Mac
Step-by-step instructions for Jobsian surrender
Remember Search and Replace?
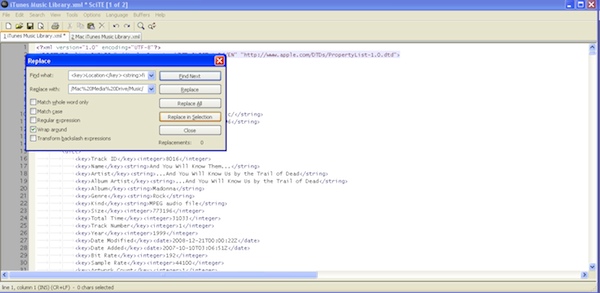
To make this happen, all we need to do is a global search and replace, where “file:\\localhost\M:\Music\” is replaced with “file://localhost/Volumes/Mac Media Drive/Music/”. This may be easier said than done, however. My library had more than 1 million lines of text, many of the text editors I used were less than pleased. I ultimately settled on a text editor known as scITE. This is just one of many that will get the job done.
Now, it's time to save the converted file to the folder iTunes for Mac uses, but first make sure that iTunes is closed and that you've thoroughly backed up the files in this location in the event you ever want to use its current library. By default, this folder is: “/Users/[account name]/Music/iTunes”.
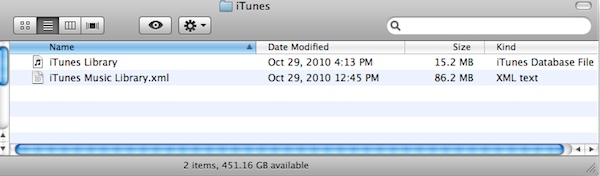
The XML file will retain precisely the same name as it had on Windows XP, so make sure it's named iTunes Music Library.xml. We will also need to move iTunes Library.itl to the same location, but for some reason, the file is called simply iTunes Library on the Mac. Copy the latter file and paste it to the same location, and then drop the “itl” extension. When you're done “/Users/[account name]/Music/iTunes” will have just two files in it and will look like this: