Original URL: https://www.theregister.com/2010/07/16/vulture_1/
Our Vulture 1 aircraft begins to take shape
Fuselage assembly snaps for your viewing pleasure
Posted in Science, 16th July 2010 12:13 GMT
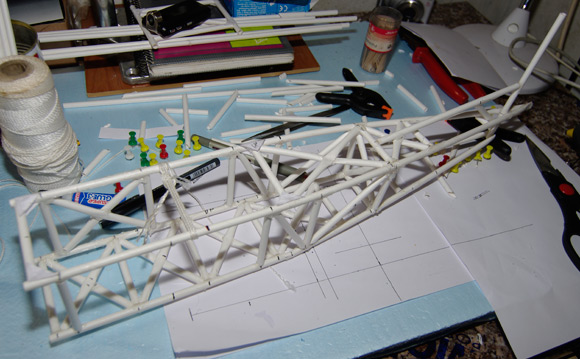
It's been a busy week down at the Paper Aircraft Released Into Space (PARIS) assembly plant, where the fuselage of the Vulture 1 has been taking shape.
The aircraft has now been dubbed the Vulture 1-X pending flight tests, but there's plenty more construction ahead before the vehicle can take to the skies.
 As previously noted, the 1-X's structure is constructed entirely from 6mm diameter paper straws, which we're jointing with hot glue. Some of you cried foul over this adhesive, but when we did a few more preliminary tests, we discovered that the hot glue was actually melting the straws' wax coating, resulting in a better bond than with cold glues.
We put a sample joint in the freezer for 12 hours, and were satisfied that hot glue would do the job, so without further ado we got stuck into the fuselage.
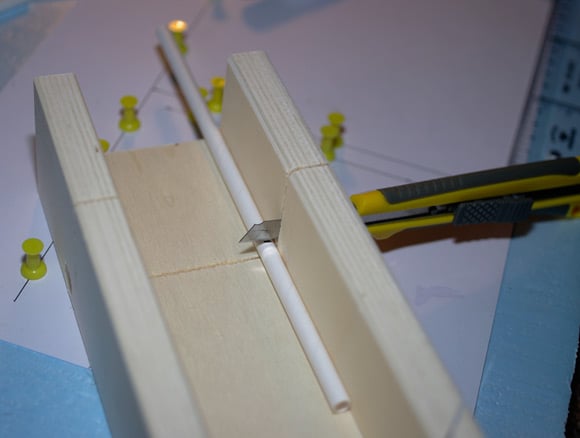
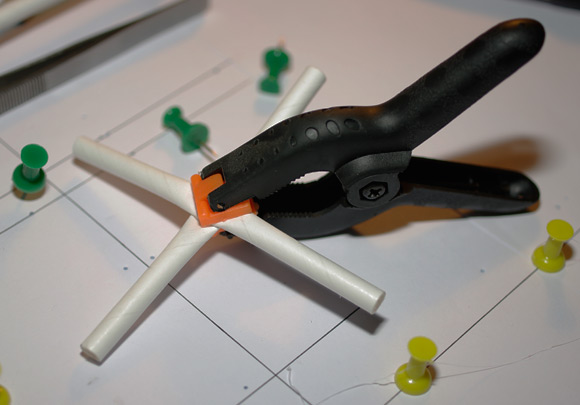
Here's our cunning jig for assembling 90-degree junctions, with a sample joint reinforced with paper brackets. We kicked off by using Superglue for these reinforcements, but weren't satisfied with the strength and later abandoned it in favour of two-part epoxy.
To get a really straight cut, we fished a mitre block out of the toolshed, although you can get an accurate enough finish with a pair of scissors.
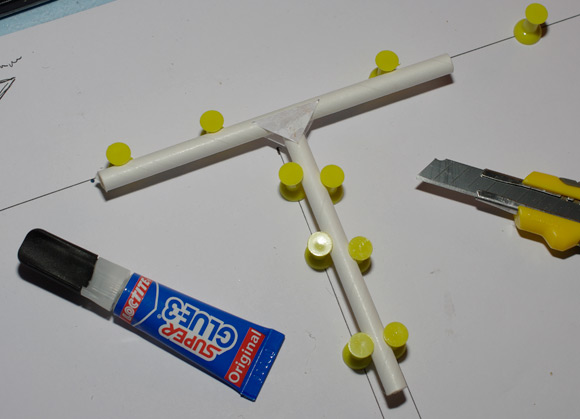
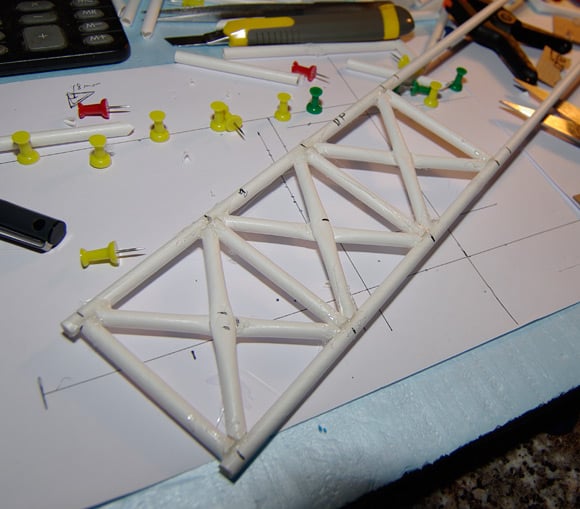
Here's the first joint for the top of the fuselage:
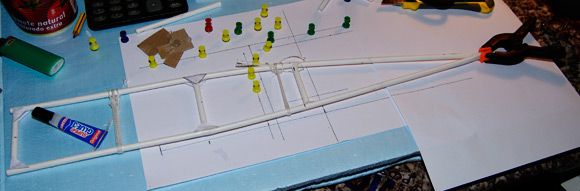
And the whole thing beginning to take shape:
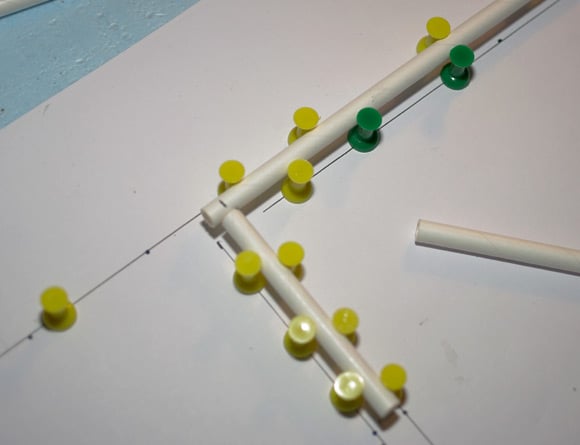
Next up, we bent the aft section of the fuselage to shape and secured it at the tail:
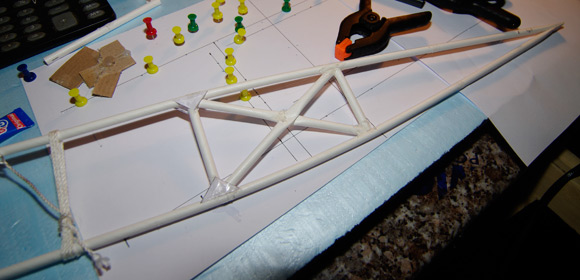
We then began to reinforce the stucture with x-braces...
,,,which we put together using this high-tech method:
Here's the top of the fuselage with the rudder post in place:
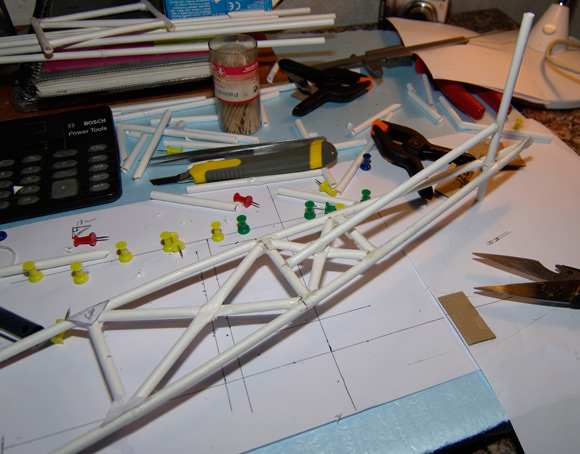
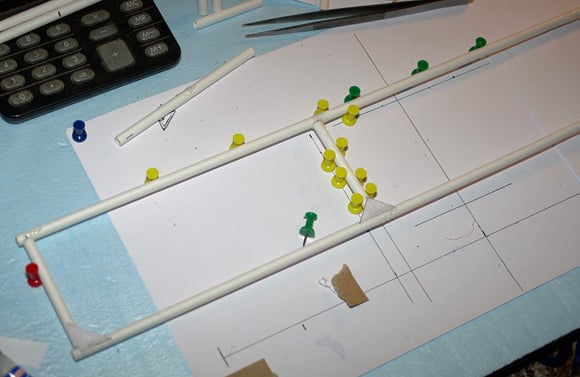
With that done, we moved on to the floor of the fuselage...
...and prepared to join it to the top:
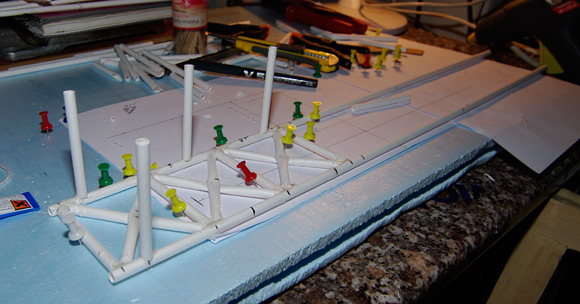
What you can't see above or in the following snap are the guides to ensure the fuselage was square before glueing, but trust us - it is.
We then attached the floor longitudinal struts to the rudder post...
... and began to add some reinforcing structure:
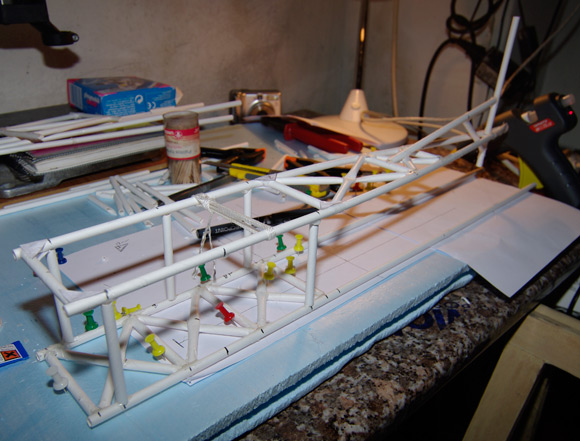
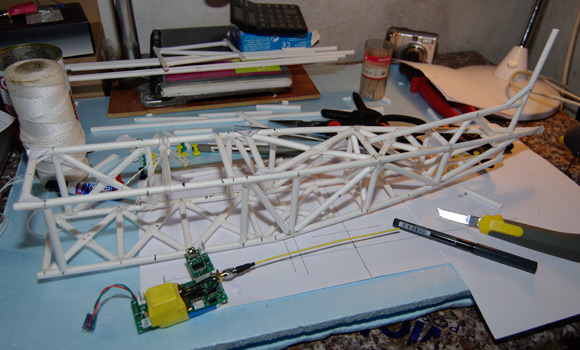
Here's the thing pretty well done, posing with the APRS/GPS telemetry transmitter:
Some of you are probably wondering why there's a big hole at the front of the fuselage's port side, so we'll explain with the help of this snap:
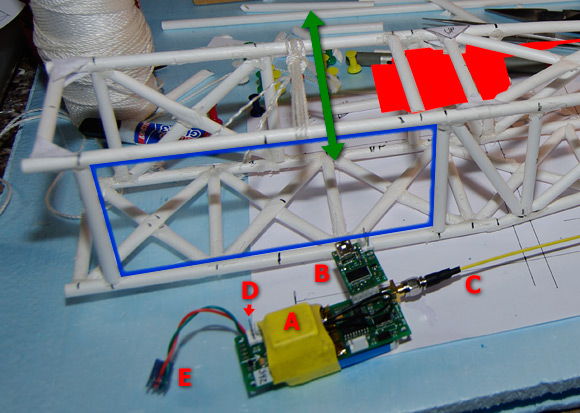
Here you can see the temporary void, marked in blue, through which we'll be inserting the Vulture 1-X tracking payload. This has proved a bit of design headache, since the main wing spar will pass as indicated by the green arrow.
The red silhouette shows the eventual position of the APRS/GPS unit inside the fuselage. It'll be encased in a styrofoam block, with the top of the GPS chip (A) exposed and facing up. The aerial (C) passes aft.
Simple enough, but we need access to both the data connection board (B) and the three-pin connector (D) into which the battery lead (E) is plugged immediately prior to flight.
The data connection board's USB socket will be accessible through the fuselage's starboard side, while the battery connector will sit just aft of the wing spar. Accordingly, a small hatch in the roof will let us get at it.
The onboard miniature camera and cockpit will be fore of the wing spar, and we've left the nose off for the time being to allow us to fit those easily.
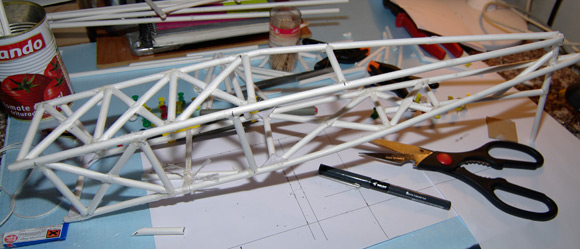
Finally, here's the whole fuselage with reinforcing brackets in place. We just need to clean up the excess glue and the job's a good 'un:
For the record, this section is 54cm long and weighs just 57 grams, although it's still lacking its external skin. Just how to skin the aircraft is our next major challenge, and we'll ponder that while lovingly teasing the APRS/GPS unit into place. More soon. ®
Additional PARIS resources
- Our dedicated PARIS section, with all previous updates, is right here.
- New to PARIS? We have a basic mission summary here (pdf).
- Our fledgling Flickr page, with all previous photos.
- Check out our YouTube channel - currently featuring a few camera tests.