This article is more than 1 year old
Clearing swap and hibernation files properly
Two neglected open books
The old-fashioned way
Let's look at doing this manually first. On Windows, the swap file is a hidden file in the root directory called pagefile.sys. To wipe it securely you must disable swapping, delete the file manually if it remains, securely wipe your disk's free space, and then re-enable swapping. This is a very cumbersome procedure, but here's how to do it:
First, ensure that you have Windows Explorer set to show hidden and protected system files. Open Windows Explorer, go to My Computer ==> Local Disk (C:), and from the menu bar choose Tools ==> Folder Options. In the Folder Options dialogue box, choose the "View" tab, and do the following: select the radio button beside the option "Show hidden files and folders", and clear the tick-box beside the option "Hide protected operating system files (Recommended)" (There are a few other useful settings here that we will discuss in a forthcoming article). Click the Apply button and close the Folder Options dialogue box.
All right, now that you can finally see what's in your filesystem, do this:
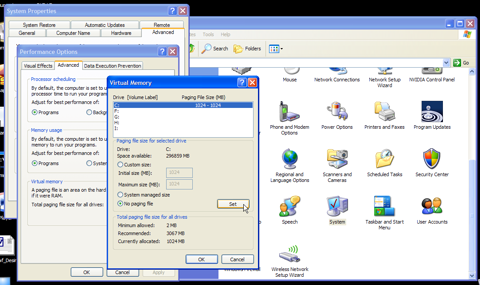
1. Disable memory swapping temporarily. Go to Control Panel ==> System ==> Advanced ==> Performance (click "Settings") ==> Advanced ==> Virtual Memory (click "Change"). On the Virtual Memory dialogue box, choose "No paging file", and click the button labelled "Set". Now click "Apply" (and "OK" several times), and re-boot your machine.

2. You are now ready to delete your swap file, if disabling virtual memory did not delete it automatically. Open Windows Explorer and navigate to the root directory, i.e., My Computer ==> Local Disk (C:). Look for pagefile.sys, and delete it if it's present. Next, empty your Recycle Bin.
3. Now, fire up your wipe utility, and wipe all the free space and file slack on your disk.
4. When that's finished, go back to Control Panel ==> System ==> Advanced ==> Performance (click "Settings") ==> Advanced ==> Virtual Memory (click "Change"). On the Virtual Memory dialogue box, choose "Custom size", ensure that the initial and maximum sizes are the same, and click the button labelled "Set". Now click "Apply" (and "OK" several times), and re-boot your machine once more. Voilà, you've got a clean swap file, at least for now.
